

What Is the Easiest Way to Update Old Cabinets? For most homes, the easiest update is a mix of deep cleaning, new hardware, and a fresh coat of paint or stain. These changes do not require a full remodel, and they can make a kitchen, bathroom, laundry room, or built-in storage area look newer without replacing the cabinet boxes.
Old cabinets often look tired because of worn finishes, dated knobs, greasy doors, or scratches near handles. The good news is that many cabinets are still strong. If the structure is solid, a simple refresh can give them a clean, modern look.
What Is the Easiest Way to Update Old Cabinets?
The easiest way to update old cabinets is to keep the cabinet boxes in place and improve the parts you see every day. This usually means cleaning the surface, changing the hardware, and painting or refinishing the doors and drawer fronts.
This approach is easier than removing the cabinets because it avoids major demolition. It also keeps the layout the same, which is helpful if your storage works well. You can focus on style instead of construction.
For many homeowners, the simplest plan looks like this:
- Clean and degrease every cabinet surface.
- Tighten loose hinges and screws.
- Replace old knobs, pulls, or handles.
- Paint or stain the doors and drawer fronts.
- Add small details, such as soft-close hinges or new bumpers.
The best choice depends on the condition of your cabinets. If the wood or cabinet material is damaged, swollen, or falling apart, a surface update may not be enough. But if the doors open well and the boxes are stable, a refresh can make a big difference.
Start With a Deep Clean
Before choosing paint colors or hardware, start with cleaning. Cabinets collect cooking grease, dust, hand oils, and food splashes. These layers can make finishes look dull. They can also stop paint or stain from sticking well.
Use a gentle cleaner made for painted or wood surfaces, or a mild dish soap mixed with warm water. Wipe the cabinets with a soft cloth, then dry them well. Pay close attention to the area around handles, the top edges of doors, and the corners near the stove.
Cleaning may not sound exciting, but it can change how cabinets look right away. Sometimes what seems like old, faded wood is simply covered with grime. A clean surface also helps you see what work is really needed.
Check the Condition After Cleaning
Once the cabinets are clean, look at them in good light. Open every door and drawer. Check for loose hinges, cracked panels, peeling finish, and water damage.
Look for these common signs:
- Doors that sag or do not close evenly
- Drawer fronts that feel loose
- Peeling laminate or chipped veneer
- Soft or swollen areas near the sink
- Deep scratches or stains in the finish
Small problems can often be fixed before you update the look. Loose screws can be tightened. Small holes can be filled. Minor scratches may disappear under paint. But large water damage or broken cabinet boxes may need more repair than a simple cosmetic update.
Remove Doors and Hardware for Better Results
If you plan to paint, stain, or replace hardware, remove the cabinet doors and drawer fronts when possible. Label each door so it goes back in the same spot. A small piece of painter’s tape inside the door works well.
Place screws, hinges, and handles in labeled bags. This helps prevent missing parts later. Even if you are replacing the hardware, it is smart to keep the old pieces until the project is done.
Removing doors makes it easier to work on flat surfaces. It also helps you avoid drips, missed edges, and paint buildup around hinges.
Simple Updates That Make Old Cabinets Look Newer
You do not always need a full repaint to improve cabinets. Some changes are fast and easy, while others take more time but create a bigger transformation.
Replace Cabinet Hardware
New hardware is one of the easiest cabinet updates. Knobs, pulls, and handles can change the style of a room quickly. Old brass knobs may make cabinets look dated. Sleek black pulls, brushed nickel handles, or simple wood knobs can give the space a fresh feel.
Before buying new hardware, measure the distance between the screw holes on your current pulls. This is called the center-to-center measurement. Choosing hardware with the same hole spacing saves time because you do not need to drill new holes or fill old ones.
Hardware style matters, too. Long bar pulls often feel modern. Round knobs can feel simple and classic. Cup pulls work well with farmhouse or traditional styles. The right choice should match the room, not just the cabinet color.
Paint the Cabinets
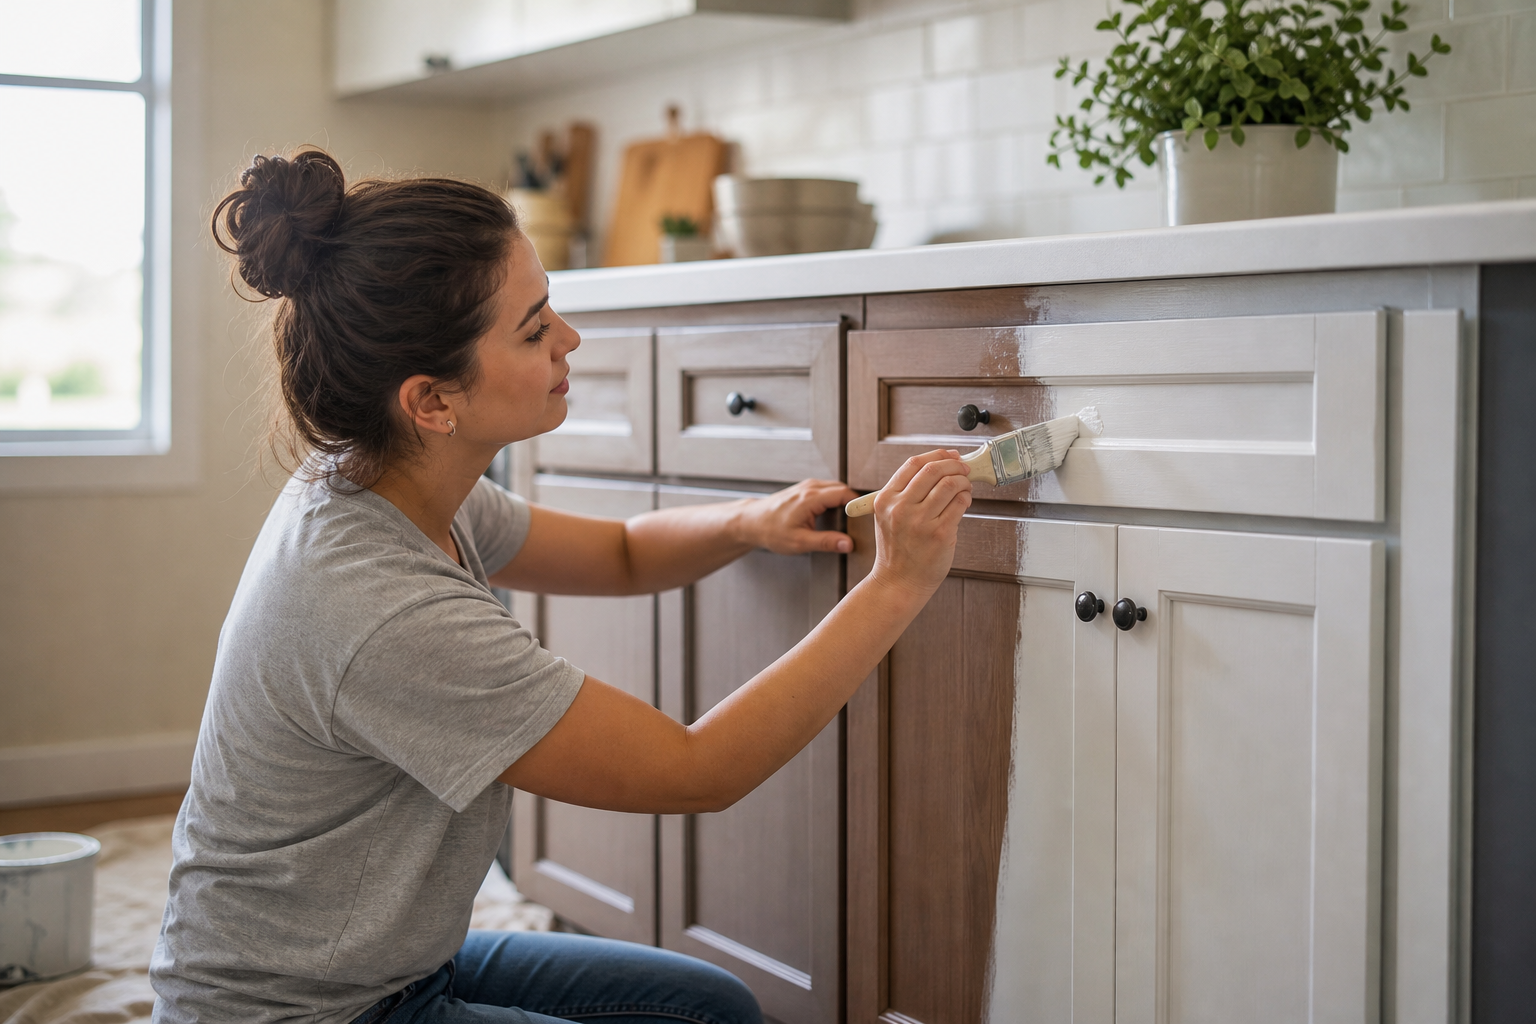
Painting is one of the most popular ways to update old cabinets because it gives a strong visual change. A dark brown cabinet can become soft white, navy blue, sage green, warm gray, or another color that fits your home.
Good prep is the key. Paint will not hide dirt, grease, or peeling finish. Sand glossy surfaces lightly so the primer can grip. Use a primer made for cabinets or slick surfaces if needed. Then use paint that can handle daily use.
Cabinets are touched often, so regular wall paint is usually not the best choice. A harder finish made for trim, doors, or cabinets is more durable. Let each coat dry fully before adding another coat or putting doors back on.
Try a Fresh Stain or Clear Finish
If your cabinets are real wood and you like the grain, stain may be a better choice than paint. Stain changes the color while keeping the natural wood look. A clear finish can also refresh wood by adding shine and protection.
Staining usually takes more careful sanding than painting. The old finish must be removed enough for the new stain to soak in evenly. If the doors have detailed trim or grooves, this can take time.
A clear coat can work if the color is still good but the surface looks dry or dull. It is a softer update than painting, but it can bring life back to wood cabinets.
Add Peel-and-Stick Details With Care
Peel-and-stick products can update parts of old cabinets, especially inside open shelves or on flat panels. Some people use removable wallpaper on cabinet interiors or adhesive film on smooth door fronts.
This can be an easy option for renters or for low-traffic areas. However, it works best on clean, smooth surfaces. It may not last as long in hot, wet, or greasy areas, such as near a stove or sink.
Use peel-and-stick details as a small design touch rather than a fix for damaged cabinets. If the surface is peeling or bumpy, the material may not sit flat.
How to Choose the Best Cabinet Update for Your Home
The best update depends on your time, budget, skill level, and the cabinet condition. A quick hardware change may take less effort. Painting takes more time, but the result can feel more complete.
Think about the room as a whole. Cabinets are a big visual feature, especially in a kitchen. If you update the cabinets but leave worn counters, old lighting, or a dated wall color, the room may still feel unfinished. That does not mean everything must be changed. It means the cabinet update should fit with the rest of the space.
For example, white cabinets can brighten a small kitchen. Dark green or navy cabinets can add depth. Natural wood can make a room feel warm. Matte black hardware can create contrast on light cabinets. Brass hardware can add warmth, but it may feel bold depending on the color.
Also think about daily cleaning. Very dark colors can show dust, while very light colors can show stains. Glossy finishes reflect light but may show fingerprints. Satin or semi-gloss finishes are common choices because they balance cleanability and style.
Tools and Supplies That Help
A cabinet update is easier when the basic tools are ready before work begins. You do not need a professional workshop for a simple refresh, but the right supplies help prevent frustration.
Useful items may include:
- Screwdriver or drill for removing doors and hardware
- Painter’s tape for labels and clean edges
- Degreasing cleaner and soft cloths
- Sanding sponge or fine-grit sandpaper
- Wood filler for small holes or dents
- Primer suited to the cabinet surface
- Cabinet, trim, or enamel paint
- Small foam roller and quality brush
- Drop cloths to protect floors and counters
Set up a clean work area with good airflow. Lay doors flat when painting if possible. This helps reduce runs and uneven spots. Keep pets and children away from wet paint, loose screws, and tools.
Common Mistakes to Avoid
Updating cabinets is simple in idea, but small mistakes can affect the final look. The most common mistake is skipping prep. Paint over grease or dust can peel. New hardware on loose doors will not solve alignment problems.
Another mistake is rushing the drying time. Cabinet paint may feel dry to the touch before it is fully cured. If doors are reinstalled too soon, they can stick, dent, or chip.
Watch out for these issues:
- Painting without cleaning first
- Skipping primer on glossy or stained surfaces
- Using wall paint instead of a more durable finish
- Forgetting to label doors and hinges
- Choosing hardware that does not fit old holes
- Closing doors before paint has hardened
- Ignoring water damage under the sink
It is also easy to pick a cabinet color from a tiny paint chip and later dislike it. Test colors on a board or hidden area. Look at the sample during the day and at night. Light changes how colors appear.
When a Simple Update Is Not Enough
Sometimes old cabinets need more than paint and hardware. If the cabinet boxes are weak, moldy, badly warped, or damaged by water, cosmetic updates may only hide the problem for a short time.
Cabinets near sinks often show damage first. If the bottom panel is soft or crumbling, the issue may be from leaks. That should be fixed before any update. Covering damage with paint does not solve the cause.
You may also need more work if the layout does not function. If drawers are too narrow, doors block appliances, or storage is poor, keeping the same cabinets may not make daily life easier. In that case, refacing, replacing doors, or a larger remodel may be worth considering.
Still, many old cabinets are stronger than they look. Solid wood doors and sturdy boxes can often be refreshed beautifully. The key is to update what is worn while respecting what still works.
Frequently Asked Questions
What is the cheapest way to update old cabinets?
The cheapest way is usually cleaning the cabinets well and replacing the hardware. If the finish still looks decent, new knobs or pulls can make the cabinets feel more current without much work.
Can I update cabinets without sanding them?
Yes, but it depends on the surface and the product you use. Some primers are made to bond to glossy surfaces, but cleaning is still very important. Light sanding often gives better, longer-lasting results.
Is painting old cabinets a good idea?
Painting old cabinets is a good idea when the cabinet boxes and doors are still solid. It can change the whole look of the room, but careful prep and drying time are important.
How long does a simple cabinet update take?
A hardware-only update may take a few hours. Painting usually takes several days because cleaning, sanding, priming, painting, and drying each need time. The exact time depends on the cabinet size.
Should I replace or update my old cabinets?
Update old cabinets if they are sturdy, useful, and fit your layout. Replace them if they are badly damaged, unsafe, or no longer meet your storage needs. The right choice depends on condition first.